
Photoshop tools created the wedding graphics we needed
to replace the wedding photograph we missed!!
Photoshop techniques were used to build wedding graphics
and create a distinctive wedding photograph of the groom.
to replace the wedding photograph we missed!!
Photoshop techniques were used to build wedding graphics
and create a distinctive wedding photograph of the groom.
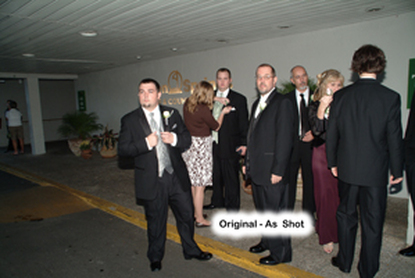
BEFORE....
|
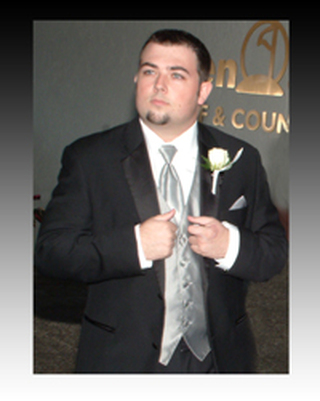
and....AFTER
|
A lackluster photo-journalistic shot photo-shopped into one of the most sophisticated and unique wedding portraits of that day.
Photoshop is so broad and deep that there are probably at least three photoshop techniques for any graphic action. I'll share the photoshop tools that worked together for me to build the wedding graphics artistry instrumental in creating the final (the 'After') wedding photograph above.
Follow along to discover how photoshop techniques and flexible photoshop layers added excitement to the wedding graphic design of the groom's portrait and as a result to our final presentation.
Directions are below, including lots of photographs to clarify the text.
For some simple photography tips for getting the best wedding shots on that most important day,
visit Free Digital Photography Tips .
visit Free Digital Photography Tips .
Steps 1 & 2 - PhotoShop Layers - Move and Straighten
It's obvious the photographer didn't get his (or her!) horizon straight.
Because of photoshop layers, this common problem is an easy fix.
This shot must be tilted to straighten it out in order to ensure our wedding graphic design has the easiest foundation to work with. Here's how....
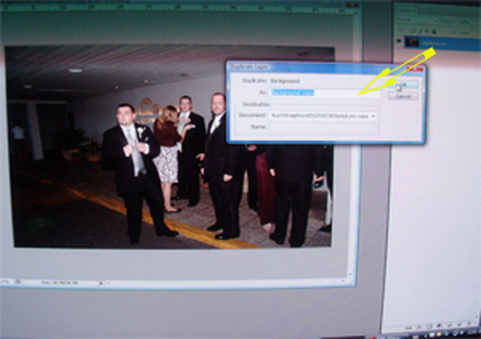
1.In Photoshop Layers Palette, Right Click on 'Background'.Then in the pop-up menu, left click on 'Create Layer From Background'. The default name for the new layer is 'Layer O'. Click 'OK' and close the box.
Because of photoshop layers, this common problem is an easy fix.
This shot must be tilted to straighten it out in order to ensure our wedding graphic design has the easiest foundation to work with. Here's how....
1.In Photoshop Layers Palette, Right Click on 'Background'.Then in the pop-up menu, left click on 'Create Layer From Background'. The default name for the new layer is 'Layer O'. Click 'OK' and close the box.
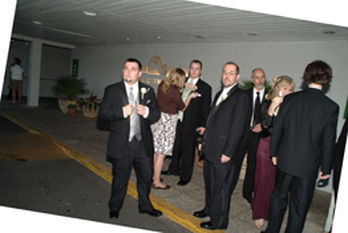
2. Hover your curser at a corner of the image - a curved arrow will appear. Straighten your image or selection (in this case, the groom is the only portion of the image that is important. A. Select the Move Tool(V); B. Select Apply on the pop-up menu.(If disatisfied, select 'Image' in the Menu at the top of the page and select 'Undo' or 'Step Backward').