
Photoshop Tutorial: Posterize & Change The Hue
Copyright Joyful Expressions
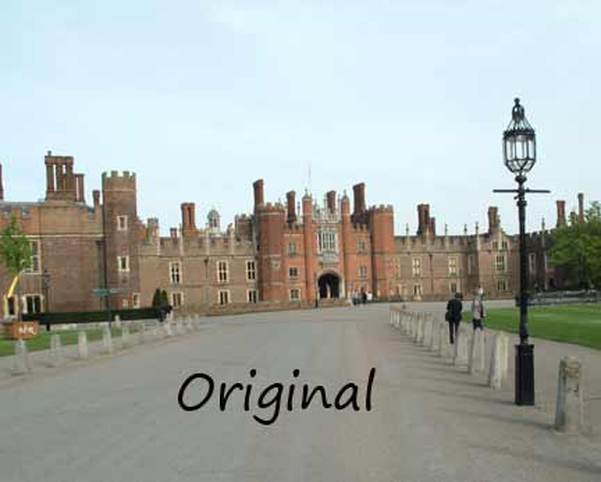
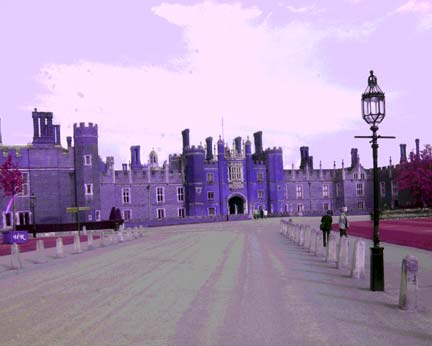
Here's Hampton Court as we shot it, but we decided to Posterize it as a means of creating a more artistic photograph. Or at least a Hampton Court Fantasy!
Follow this link to see another photo of Hampton Court with the Posterize adjustment plus additional pictures of England.
STEP 1 - CREATE A DUPLICATE LAYER OF YOUR ORIGINAL1.) Create a copy of the background layer: Right click on the panel labeled Background on the Layers Palette* (a copy is on the lower right of my screen which is shown in Step 6).
2.) On the pop-up, click on Duplicate Layer. A pop-up box will say Background copy. Click on OK and an exact duplicate of your background will show up as a new panel above your background layer.
RECOMENDATION: Always create a duplicate layer, so that your original layer remains untouched in case you don't like your enhancements.
You can re-merge them later by selecting the Layers Tab at the top of your screen and clicking on Flatten Image (if you no longer want or need the layers). Alternatively you can highlight the top layer of the two you want merged and click on merge layers which will leave any other layers untouched.
*(Incidentally, if you can't find your Layers Palette, go to the Window Tab at the top of the screen, locate Layers and click on it. The Layers Palette will open on your screen.)
STEP 2 - Selective Burn
Copyright Joyful Expressions
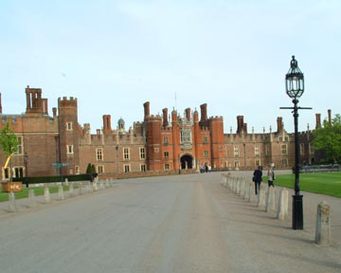
Selective Burn: On the CS3 Tool Bar (on the left side of my screen) is a Burn Tool - it looks like a fist (Dodge & Sponge are on the pop-up along with Burn).
I used the Burn Tool to "burn-in" the color on the central portion of the castle, the chimneys, the towers and the lamp in the foreground.
(Unfortunately the "burn" doesn't show up well here.Try it yourself to see what I mean. It acts similar to Saturation, but you can apply the Burn Tool selectively right where you want it!)
STEP 3 - Photo Filter
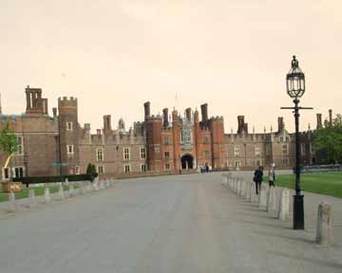
(I only wanted Sepia applied to the sky, so I first used the Magic Wand tool on the sky. Once the sky was outlined, I made it a separate layer and applied the Photo Filter.)
On the tabs at the top of the Photoshop screen, I selected the Image tab. On the pop-up I selected Adjustments and on the next pop-up menu, I chose Photo Filter. I selected Sepia and used the slider until I got the effect I wanted.
On the tabs at the top of the Photoshop screen, I selected the Image tab. On the pop-up I selected Adjustments and on the next pop-up menu, I chose Photo Filter. I selected Sepia and used the slider until I got the effect I wanted.
STEP 4 - Use Adjustment Layer To Change The Hue
At the bottom of the Layers Palette on the right of the screen is a small ball that looks like a half black "ying-yang". (Illustrated in Step 6)
Hover over that and a pop-up says, "Create new fill or adjustment layer".
Click on it and an Adjustment Menu pops up. Select Hue Saturation. I slid the Hue slider to minus 125 (almost all the way to the left).
The beauty of the filter at the bottom of the Layers Palette is that it creates a new layer. Simply double click on the Adjustment Layer at any time to readjust your adjustments.
STEP 5 - Use Adjustment Layer To Change The Saturation
Repeat Step 4, but instead of moving the Hue slider, I adjusted the Saturation slider (to +20).
(I could have adjusted both the Hue and the Saturation at the same time on the same layer, but I wanted to review the effects separately.)
(I could have adjusted both the Hue and the Saturation at the same time on the same layer, but I wanted to review the effects separately.)
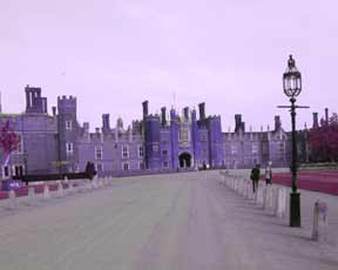
STEP 6- Use Adjustment Layer To Posterize
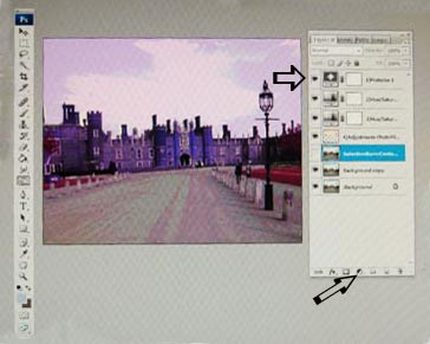
Again use theAdjustment Filterat the bottom of the Layers Palette, but select Posterize at the bottom of the pop-up menu (on version CS3 of Photoshop) and adjust the pop-up slider. I slid it to Level 11.
(The arrows point to the Posterize Layer on the Layers Palette, and the Adjustment Filter at the bottom.)
Final: Hampton Castle Fantasy Using The Posterize Tool Plus Hue Adjustment
Copyright Joyful Expressions Photography
Hampton Castle Fantasy was "morphed" for fun, or maybe as an illustration for a children's book!
We hope this Photoshop Tutorial has also helped tweek your imagination.We encourage you to apply the Posterize adjustment
and other Photoshop Techniques to enhance or have fun with your own photos as you pursue your desire to create photography art.
We hope this Photoshop Tutorial has also helped tweek your imagination.We encourage you to apply the Posterize adjustment
and other Photoshop Techniques to enhance or have fun with your own photos as you pursue your desire to create photography art.