
Add Pizzazz With A Gradient Photoshop Frame!

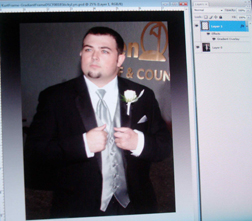
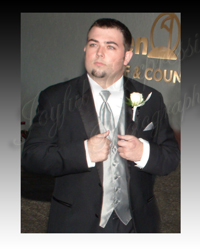
Our groom (right) is completed with a gradiant Photoshop Frame. If you haven't learned how we cropped him from a non-descript candid photo and created his elegant portrait, please click on the link below.
Click here for the Joyful Expressions Photoshop Tutorial on Cropping a Photo, and previous tips on creating a Photoshop frame.
Create A New Layer For Your Photoshop FrameNow I'll show you how to easily add a beautiful gradiant shine to any frame created in Photoshop. Not only is it simple (at least it is once you've done it once or twice!), but Photoshop actually provides the gradiant as a done deal.
If you're just starting out with graphics and/or Photoshop, you may not know just what a gradiant is (I didn't at first).
A gradiant is actually 2 colors that gradually (or not!) blend into a wide or narrow overlay. Photoshop provides a variety of gradiants (and you can create more of your own). The one we're using today is my favorite, and you will soon discover (if you like creating) that you can tweak in many different ways.
But let's continue with our directions for a gradiant Photoshop frame
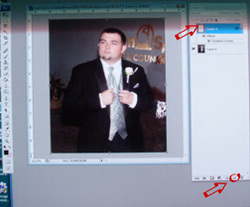
1. Click on the Layer icon at the bottom of the Layers Palette (to the left of Trash). This will create a space on the Layers Palette for your Photoshop frame.

2. Click on the Rectangular Marquee Tool, and outline a rectangular frame over your picture. (The Eliptical Marquee Tool shows on my diagram, but a box will pop open when you click on it, and you can select Rectangular - or Eliptical if you prefer oval)

3.Click on SELECT on the menu bar at the top of your screen.
4. Click on INVERSE on the Dropdown Menu, so that the double row of "marching ants" borders your picture.
5.Click on the Color swatch at the bottom of the verticle Photoshop Tool Bar to select your frame color.
7. Make sure that you are working on the Frame Layer in the Layers Menu. ( Hint: Label your layers - for example layer your frame layer, FRAME)
|
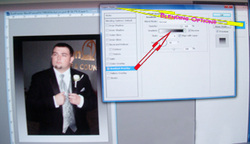
8.Right click on your Frame Layer, and click on BlendingOptions.A Menu Box will pop up.

9. Check Gradiant Overlay, and VOILA!, your frame will have a shiny metalic border!
PS: To change to a different gradiant, click on Gradiant Overlay to open an info box, and experiment with the options until you get the effect you want. (You won't hurt anything - just cancel and exit the Gradiant Box if you don't like the new effect)
We hope you've found this helpful, and that your creative juices are flowing!.
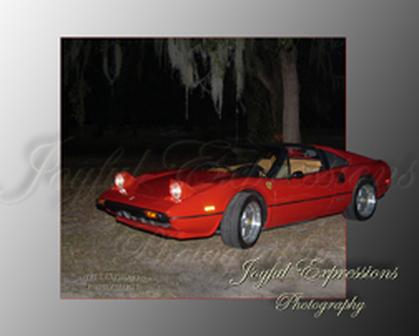
This photoshop frame works just as well on a Ferrari! If your photo needs exposure correction, click here for photoshop how to. JOYFUL EXPRESSIONS PHOTOGRAPHY & GRAPHICS keeps me busy, but I love sharing what I've learned and we will be adding more graphics as time allows. We hope you'll "come on back", and feel free to offer suggestions, or ask questions. |
